Fix River Network
Understanding the flow direction (where the water is going and which river section is downstream) is a critical aspect of the river network. This information is very important for calculating the flow of each river section and determining accumulated values. This tool calculates it and stores it in the attribute table of the output through two important columns:
NET_ID: identification number of the river section
NET_TO: identification number of the downstream river section
Additionally, it can happen that the intersection between the river network and the subcatchments is not perfectly aligned. This misalignment can cause issues in later steps of the plugin, so better fix the input beforehand! We solve it because otherwise the model struggles to understand where the water is flowing and it can cause errors or over/under estimation during the flow model like shown in Fig. 2.
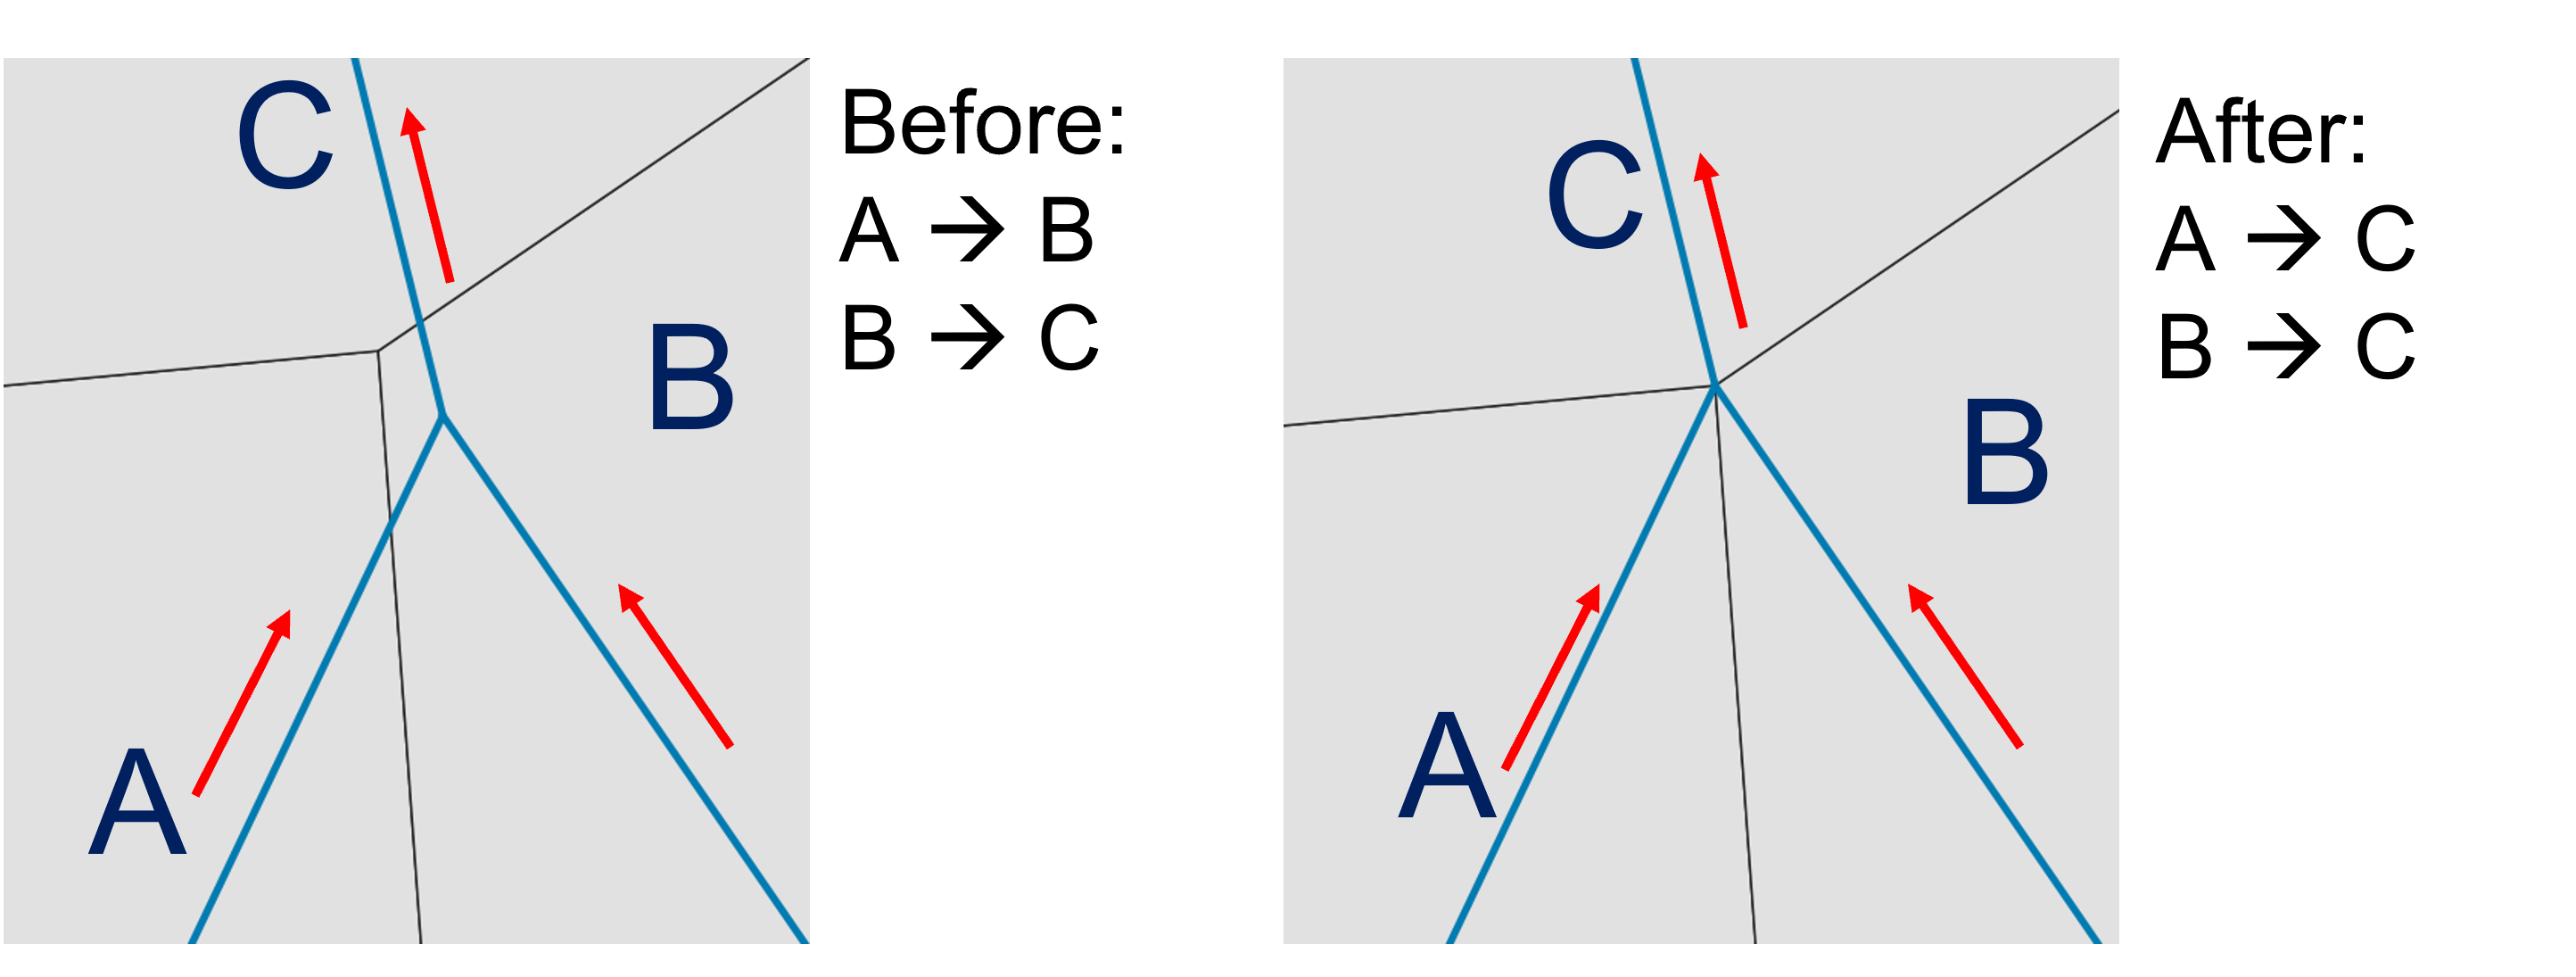
Fig. 2 On the left: misalignment between river network and subcatchments. On the right: fixed result after running the tool.
If the misalignment is greater than 10 cm, the plugin will not fix it and it is necessary to manually adjust the input file.
Input data
Two input data are necessary for this tool:
subcatchments.shp
river_network.shp
The subcatchments.shp is a polygon shapefile that describes the division of the catchment in water basins. The river_network.shp is a line shapefile that represents the river network within the catchment. It is important that all the sections are connected to each others without gaps. It is also required a precise alignment between the river network and the subcatchments (like already explained above). For this tool, their attributes are not important, more important is their geometry. An example representing these input data related to the Warnow catchment (Germany) can be found in Fig. 3.

Fig. 3 On the left: example of subcatchment shapefile. On the right: example of river network. Source: https://umweltportal.mv-regierung.de/portale/wschutzgebiete/
Workflow
Add all the input data to the project by clicking on “Layer –> Add Layer –> Add Vector Layer”
Go in the Processing Toolbox and look for the APRIORA plugin. Click on Hydro-Module and open 1 - Fix River Network
Choose subcatchments.shp as input for Catchment areas
Choose river_network.shp as input for River network
Click on the three dots and click on the outlet point of the river network. The selected point does not have to be exactly on the outlet, just approximately there.
Click on Run
Output data:
fixed_river_network.shp
ungauged_subcatchments.shp
In fixed_river_network.shp, two new columns have been added to the attribute table: NET_ID and NET_TO. These columns, like explained before, represent respectively the river network ID of each specific section and the river network ID of the downstream river section. Before we continue, it is important to check if the new colums are populated correctly for all river sections. If any value under NET_TO is marked as unconnected, it might be due to the fact that the river sections are not connected with each others. Check the geometry of the unconnected river sections, manually adjust them and re-run the tool until there are no unconnected values in the NET_TO column. Important: apply the changes to the original file river_network.shp and not to fixed_river_network.shp.
In the attribute table of ungauged_subcatchments.shp, you will find a new column called CATCH_ID. This field assigns a unique code to each subcatchment and river section, making it easier to link subcatchments with their corresponding river section in later steps.