API parameter selection
This tool is giving the user the access to the APRIORA’s internal database related to consumption data, removal rates and PNEC values.
The tool contains 4 different windows:
In the next paragraphs, the functionalities of each windows are described. More detailed instruction on how to use them can be found in the video-tutorial in the Workflow section below.
Consumption data
With:
\(m_{i,y}\) = yearly consumption of y API [\(mg/inh/a\)]
\(m_{cp,y}\) = yearly prescribed API intake [\(kg/a\)]
\(m_{cs,y}\) = yearly sold over-the-counter API intake [\(kg/a\)]
\(e\) = API specific excretion rate [-]
\(n_{pop}\) = population in the reference area for intake data [-]
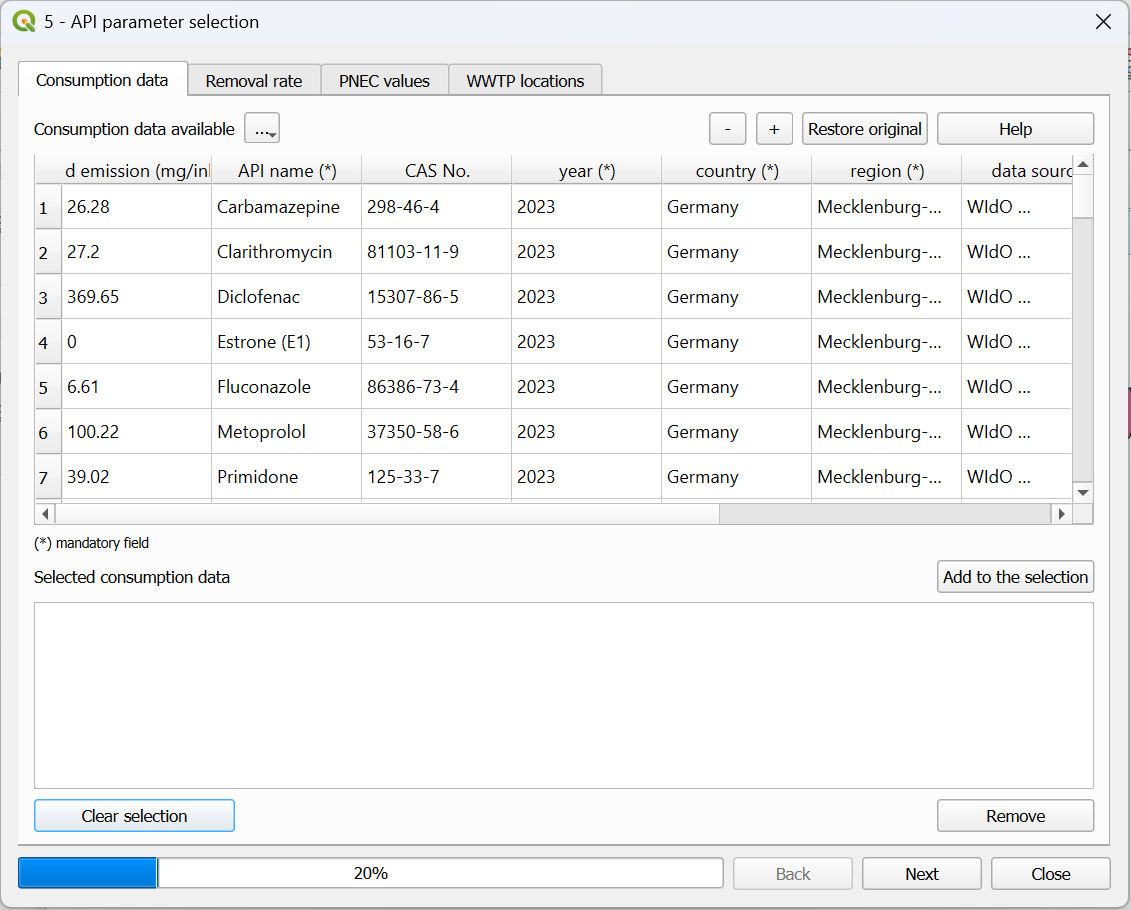
Fig. 14 Interface of the “Consumption data” window within the API parameter selection tool.
Input data
For this tool no input data is required. All the necessary input data (consumption values) are already provided. In case the user would like to add their own input data, it is possible to do so.
Workflow
Click on the 5 - API parameter selection icon in the menu toolbar or go under Plugins –> 5 - API parameter selection
Go on the “Consumption data” window
Explore the database and find the APIs that you are interested in (e.g., Carbamazepine and Diclofenac for 2023, Germany, MV)
Select the substances, click on “Add to the selection” and the substance will be added in the “Selected consumption data” window
Repeat the steps 3&4 with all the interested APIs
In case the user would like to add custom substances:
Click on the “+” icon
Go to the bottom of the table and fill out the “API input”, “API name”, “year”, “country” and “region” fields. The other fields can be kept empty.
Add to the selection the newly added API by repeating the steps 3&4.
In case the user would like to export the consumption table with other users:
Click on the three dots in the top left corner and select “Export table (for sharing only)”
In case the user would like to import the consumption table from other users:
Click on the three dots in the top left corner and select “Import external consumption table”
Important
Video tutorial will follow soon.
Removal rate
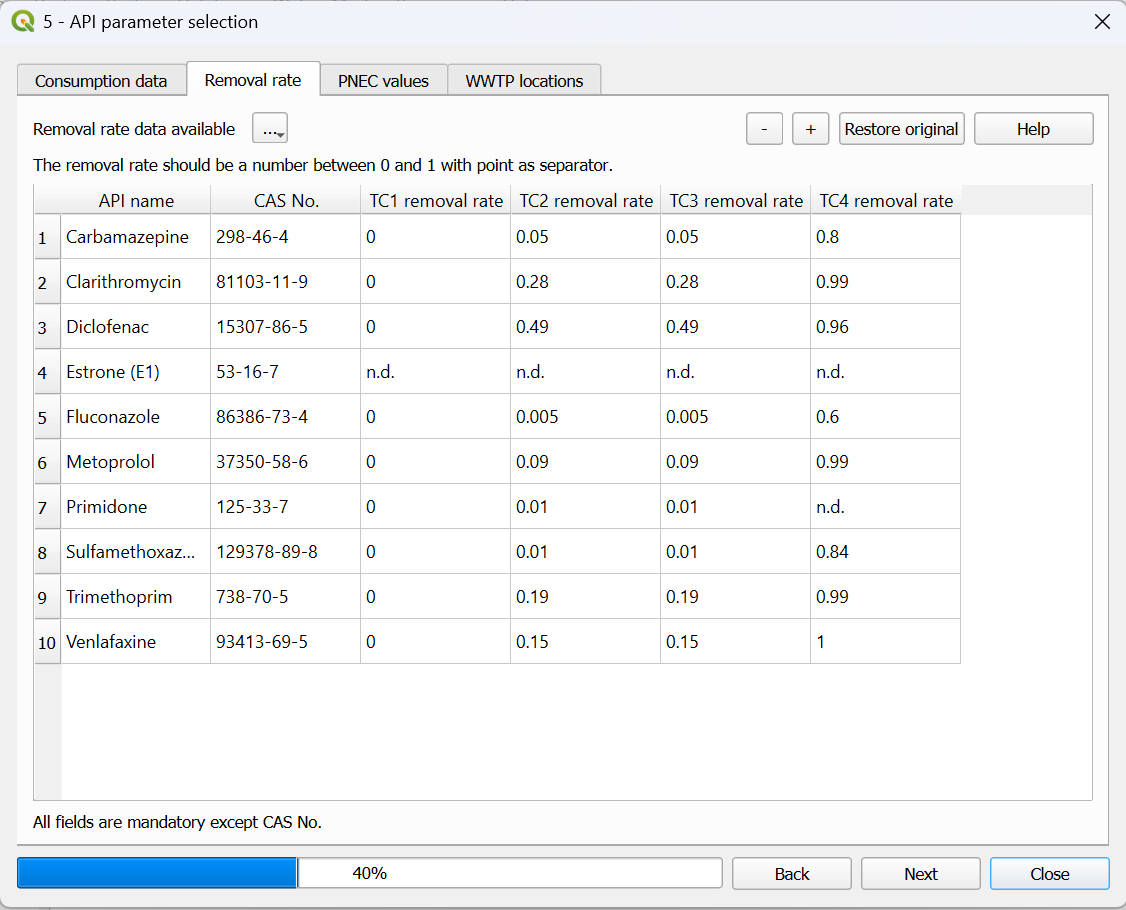
Fig. 15 Interface of the “Removal rate” window within the API parameter selection tool.
Input data
For this tool no input data is required. All the necessary input data (removal rates) are already provided. In case the user would like to add their own input data, it is possible to do so.
Workflow
Go on the “Removal rate” window
Check if the values for the different APIs and different technical classes are correct
In case you would like to change something, simply double click on a number and update the value
In case you would like to add a new substance, click on the “+” icon and fill out all the fields (“CAS No.” can be kept empty)
In case the user would like to export the removal rate table with other users:
Click on the three dots in the top left corner and select “Export table (for sharing only)”
In case the user would like to import the removal rate table from other users:
Click on the three dots in the top left corner and select “Import external removal rate table”
Important
Video tutorial will follow soon.
PNEC values
Environmental Risk Assessment (ERA)
Human Health Risk Assessment (HHRA)
Antimicrobial Resistance Risk Assessment (AMR-RA)
All the PNEC values are expressed in ng/L. With a similar logic like before, the user can add a new substance (or edit the current value) by clicking on the “+” icon.
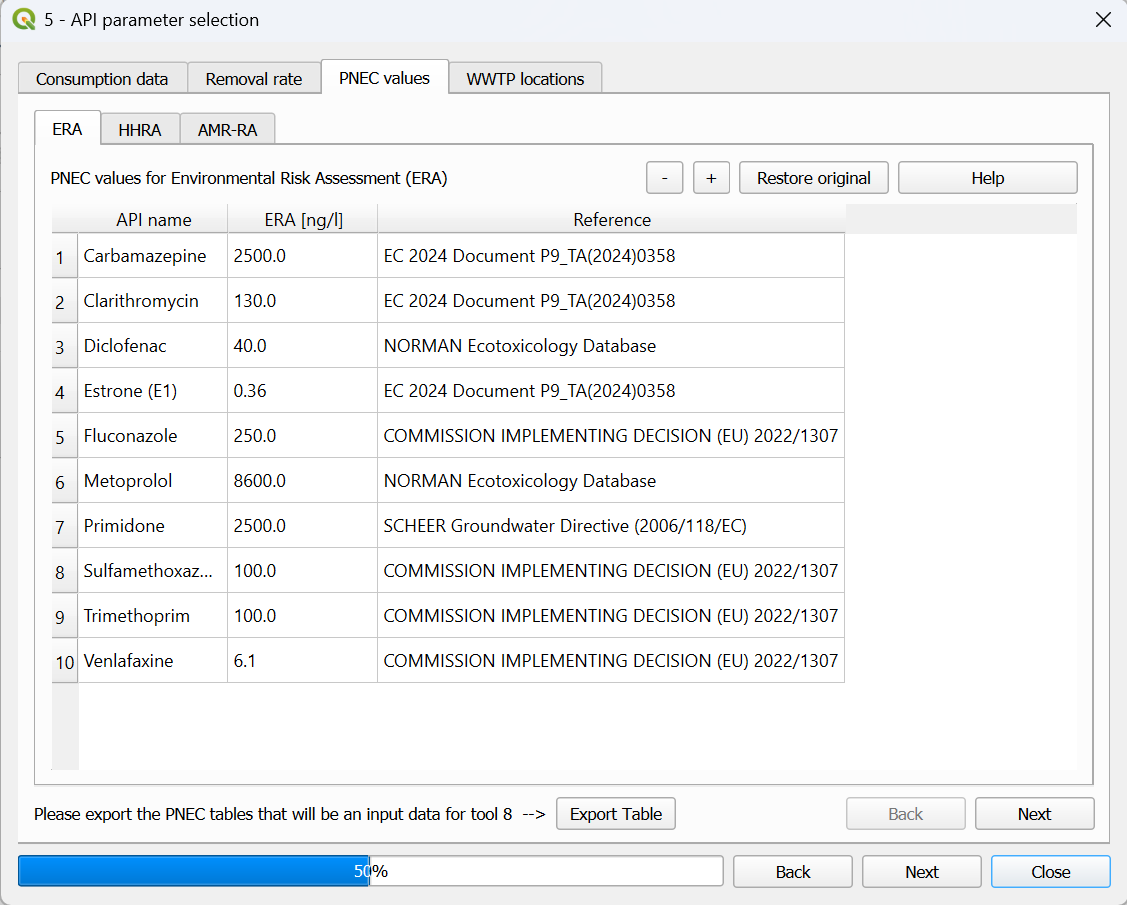
Fig. 16 Interface of the “PNEC values” window within the API parameter selection tool.
Input data
For this tool no input data is required. All the necessary input data (PNEC values) are already provided. In case the user would like to add their own input data, it is possible to do so.
Workflow
Go on the “PNEC values” window
Check if the values for the different APIs are correct
In case you would like to change something, simply double click on a number and update the value
In case you would like to add a new substance, click on the “+” icon and fill out the corresponding row
After all the edits, click on “Export Table”. The table will be saved and added to the project. It will be used as an input for Risk Assessment.
Important
Video tutorial will follow soon.
WWTP locations
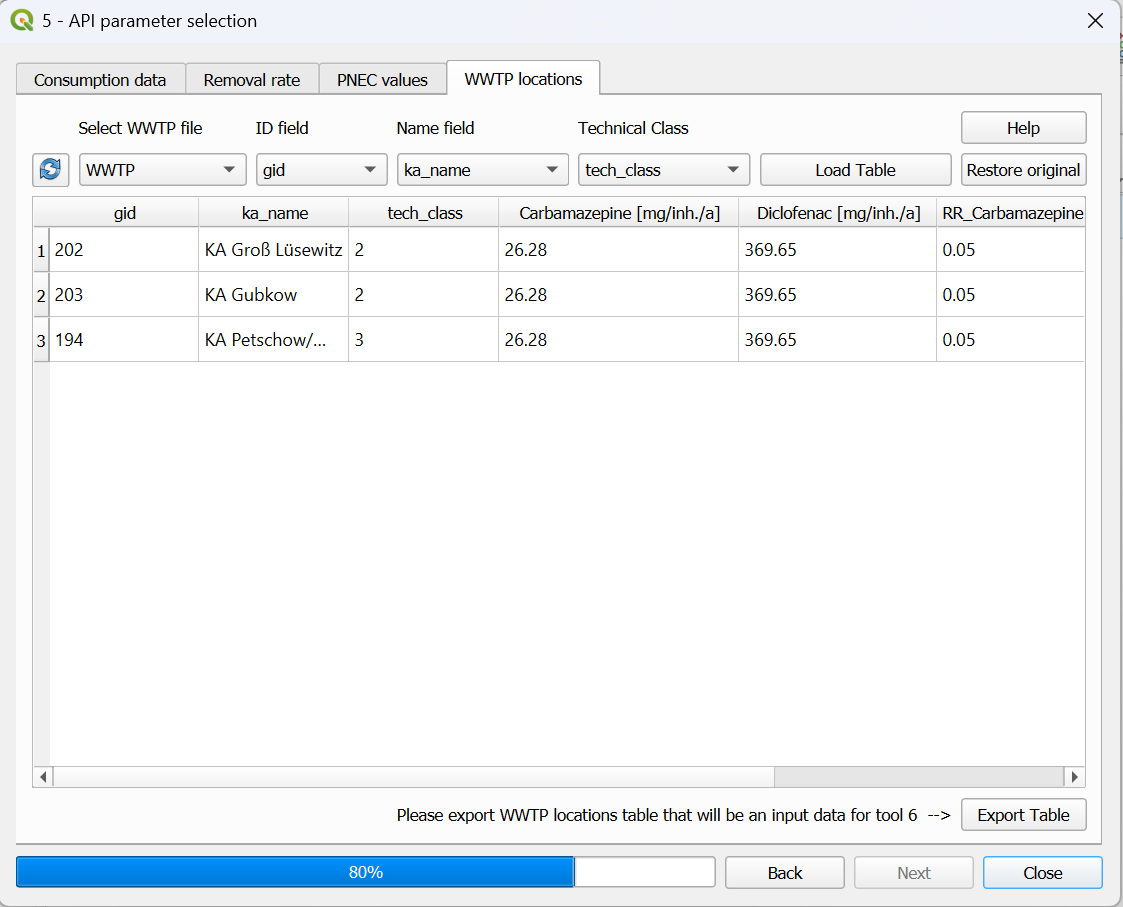
Fig. 17 Interface of the “WWTP locations” window within the API parameter selection tool.
Input data
One input data is necessary for this tool:
WWTP.shp
The WWTP.shp is a point shapefile containing the emission point of the WWTPs as geometry and important information of the facilities in the attribute table. The required information are: ID and name of the WWTP; number of connected inhabitant; number representing the type of treatment (1=primary, 2=secondary, 3=tertiary, 4=quaternary). An example of these information can be summarized by Table 5.
Workflow
Go on the “WWTP locations” window
Select the WWTP shapefile and specify the field for ID, name and technical class. In case you cannot find the shapefile between the available ones, click on the reload button.
Click on “Load Table”
Check the consumption values and removal rates at each WWTPs. In case you would like to change something, double click on a number and update the value.
After all the edits, click on “Export Table”. The table will be saved and added to the project. It will be used as an input for Emission Loads.
Important
Video tutorial will follow soon.